PART 1: SETUP
To improve the performance of developers, the use of IDEs is essential. In order to develop embedded applications for IoT, specifically for the VBLUno51 (and other versions) board of VNGIoTLab, we propose the following environment:
- Software (free)
- Compiler: GCC ARM Embedded
- IDE: Eclipse C/C++ với GNU ARM Eclipse plugin
- Build Tools: Only need to install on Windows OS
- Flash and Debug: pyOCD or OpenOCD
- Hardware:
- VNG VBLUno51 board: Nordic nRF51822 microcontroller with Bluetooth Low Energy and DAPLINK interface on-board
The installation steps are quite simple, you follow the instructions below:
Step 1: Install GNU ARM Toolchain
http://gnuarmeclipse.github.io/toolchain/install/
Step 2: Install Eclipse C/C++
http://www.eclipse.org/downloads/?
Step 3: Install GNU ARM Eclipse plugin for Eclipse
-
This is a plugin that allows the use of the Eclipse IDE to develop applications for ARM microcontrollers with the GCC_ARM compiler. Compared to using only commands line tool, using Eclipse allows you to program, compile, and debug in a GUI environment that is convenient for developers.
-
After installing Eclipse C/C ++, you can go to the Eclipse Marketplace, search for “GNU ARM Eclipse” and install the GNU ARM Eclipse plugin.
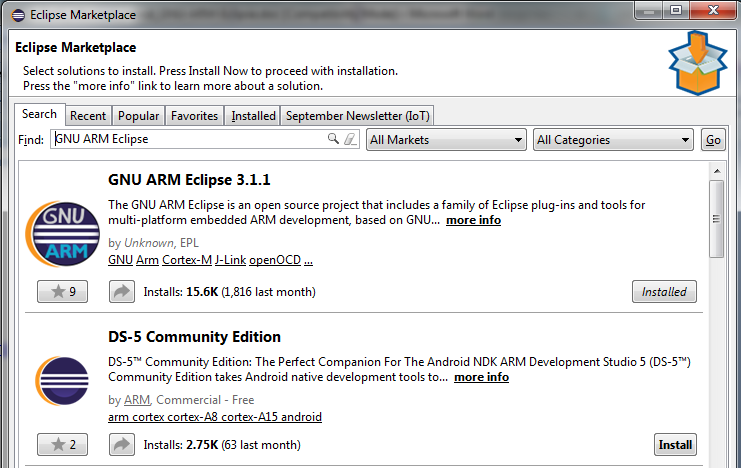
- See more at http://gnuarmeclipse.github.io/
Step 4: Install GNU ARM Eclipse Windows Build Tool (For Windows OS only)
-
http://gnuarmeclipse.github.io/windows-build-tools/
-
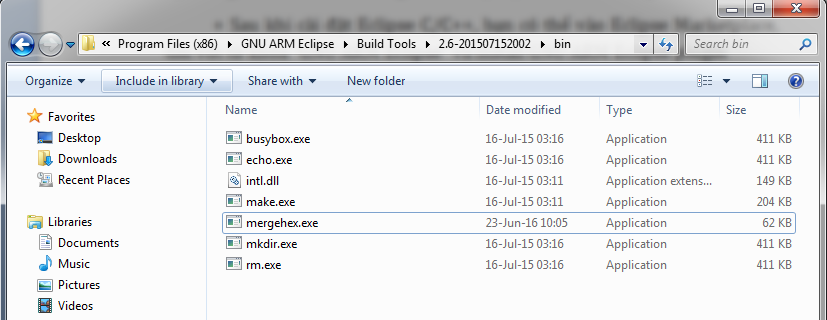
After installation, do not forget to set the system path for the directory you just installed. For example:
“C:\Program Files (x86)\GNU ARM Eclipse\Build Tools\2.6-201507152002\bin”
- In the above folder, copy “busybox.exe” and rename it to “mkdir.exe”
Step 5: Install merge hex file tool
-
Linux: install
srec_cat -
Windows:
Use mergehex.exe . You can download at HERE
Copy mergehex.exe into the same folder “…GNU ARM Eclipse\Build Tools\2.6-201507152002\bin”
PART 2: BUILD A PROJECT
- The following project uses:
- The VBLUno51 board of VNGIoTLab (MCU: Nordic nRF51822 (Cortex-M0))
- Toolchain: GCC ARM Embedded.
- IDE: Eclipse với GNU ARM Eclipse plugin.
- Project: Blinking Led and UART communication, using mbed-OS
Step 1: Export project to computer
-
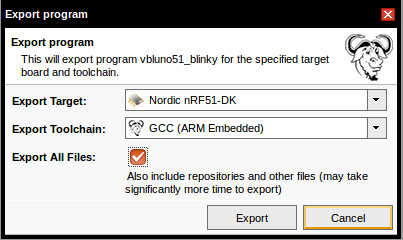
There are many ways to create a mbed-OS project for the the VBLUno51 board. In this tutorial, using simple way that exporting a sample project from the mbed Online Compiler to your computer. The essence of this job is that mbed Online Compiler gives us a project with the necessary files and makefile available, suitable for nRF51822.
-
Access to mbed Online Compiler, export the project that is done in
Using mbed Online Compilertutorial to your computer, select GCC ARM Embedded toolchain

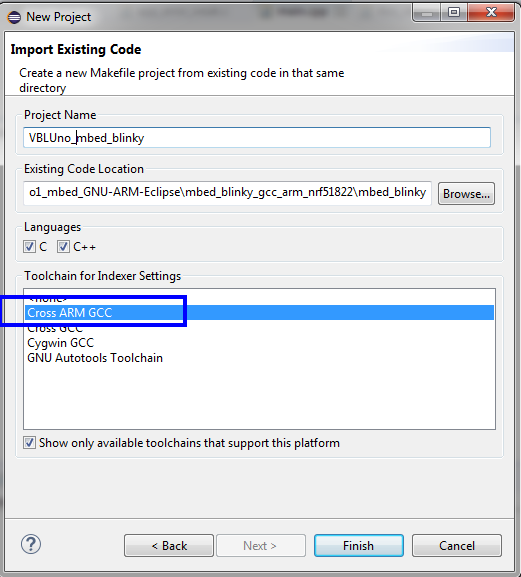
Step 2: Create a project with Eclipse
-
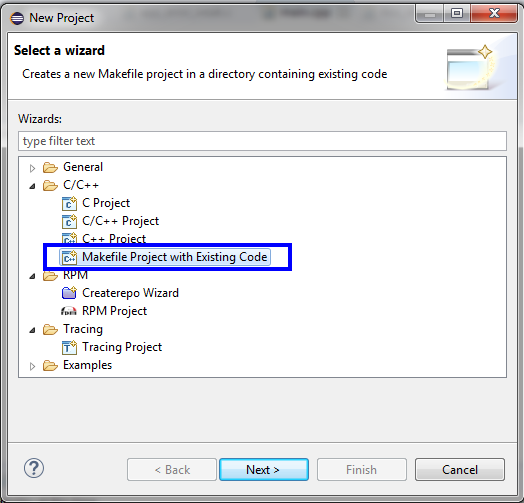
File -> New -> Project
-
C/C++ -> Makefile Project with Existing Code
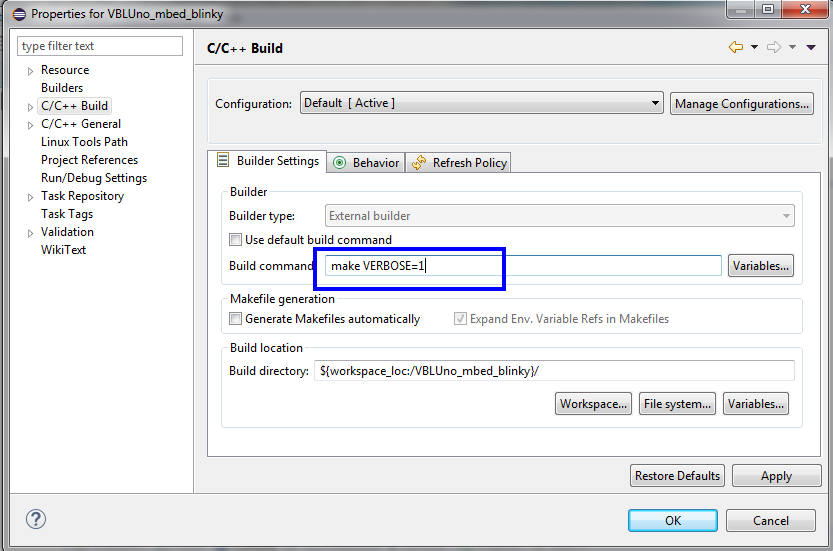
Step 3: Configuration for the project
-
Right click at project -> select Properties
-
At
C/C++ Build, select Builder Settings, edit build command as the below image
Step 4: Build project
- We do not need to create a new Makefile, because we used the makefile that got by exporting the project from mbed Online Compiler. Edit this makefile as follows:
- Add the below contents:

SOFTDEVICE = ../mbed/TARGET_NRF51_DK/TARGET_NORDIC/TARGET_NRF5/TARGET_MCU_NRF51822_UNIFIED/sdk/softdevice/s130/hex/s130_nrf51_2.0.0_softdevice.hex

# For Debug or NoDebug
ifeq ($(DEBUG), 1)
  C_FLAGS += -DDEBUG -O0 -g3
  CXX_FLAGS += -DDEBUG -O0 -g3
else
  C_FLAGS += -DNDEBUG -Os
  CXX_FLAGS += -DNDEBUG -Os
endif


- For Window OS Only:
Edit "$(SREC_CAT) ../mbed/TARGET_NRF51_DK............." line to
mergehex -m $(SOFTDEVICE) $(PROJECT).hex -o combined.hex
-
Right click at Project -> choose Build Project
-
If success, compile results as the below image

Step 5: Load executable file into the VBLUno51 board
We need to note two executable files with extension (* .hex) in the .build directory
-
mbed_blinky.hex: Only
Applicationprogram, withoutSoft Device -
combined.hex: contains
Soft DeviceandApplication

We load the combined.hex file into the VBLUno51 board by copying the file to the DAPLINK partition.
Note: The instructions for using pyOCD and OpenOCD for debug will be covered in the Tutorials section
Download
- You can download source code at HERE